Monday, March 4, 2024

Cheesy Taco Pasta


1 lb ground beef
1 pkg taco seasoning
8 oz your choice of pasta, I used rigatoni
1 cup Colby Jack cheese
1 cup heavy whipping cream (or Half n' Half)
1 cup pasta water

Cook pasta according to package instructions, adding a couple pinches of salt.

Brown the ground beef and prepare taco meat according to package instructions.

When pasta has about 5 mins left, sprinkle cheese on the taco meat and allow it to melt. Then add cream, stirring well. Add pasta water just before the pasta is done. Stir well and turn heat to medium. Drain pasta and add to taco meat mixture. Cook an additional 3 minutes and serve up. You can add more cheese when serving.


Friday, November 12, 2021

Dill Ranch Crackers

Want an easy snack without a lot of mess? This is it.

1 c warm oil
1 T dill weed
1 T lemon pepper
1 pkg dry ranch dressing
2 bags oyster crackers

Mix the first four ingredients together until well-blended. Pour over crackers in a large bowl with a lid or paper grocery bag, then shake the living bejeezus out of it until all the crackers are covered. Let sit until all the oil has been absorbed by the crackers (or the bag). Eat by the handful until you can't move.

Wednesday, July 19, 2017

Cucumber and Tomato Salad


Want an easy cucumber salad that won't take forever to make? This is it. And it's insanely simple. 4 ingredients.

2-3 peeled, sliced (or chopped) cucumbers
1 pint of grape (or cherry) tomatoes, halved
4-6 sliced green onions (amount is up to you. Add more or less depending on your tastes)
1c Italian dressing

Mix. Serve. Refrigerate leftovers. Repeat.

See? I told you it was simple.

If you want, you can use a splash of balsamic vinegar with it. I usually do this along with a little salt and pepper, sometimes even garlic salt.

But seriously, it'll take you longer to eat it than it will to make it.

Monday, July 17, 2017

Sun-dried Tomato Chicken


I don't think you're ready for this recipe.

Nah, seriously. This is an adult recipe. This is something that goes on behind closed kitchen doors. It's that good.

You sure?

Okay. But don't say you weren't warned.

Ingredients:

3 boneless, skinless chicken breasts, pounded flat for even cooking
2 T butter and/or olive oil (I used the oil from the jar of sun-dried tomatoes)
¼ - ½ c sun-dried tomatoes in olive oil (slice thinly or buy julienned), drained
2-3 cloves garlic, smashed and minced
2-3 tsp Italian seasoning (or basil, thyme and oregano, depending on your tastes)
1 T Balsamic vinegar
½ c chicken broth
1 c heavy cream (or half-n-half, if you don't want the extra calories)
2 c fresh spinach leaves
¾ c Parmesan cheese
salt and pepper to taste

Pasta of your choice, cooked to package directions. I used linguine, but fettuccine, spaghetti, tortellini, or cheese ravioli would be fantastic!

1. Heat the butter/olive oil in a large skillet and add chicken breasts. Spinkle with salt, pepper and Italian seasoning and cook on both sides until golden and chicken is done. Set chicken aside and cover with foil to keep warm while you cook the sauce.

2. To the pan (you should still have a little oil left, along with the chicken drippings), add garlic and tomatoes. Stir them around a little bit until the garlic turns a light brown color, then add the balsamic vinegar and chicken broth. You can add more Italian seasoning at this point, if you want to. Turn the heat up a little and let the sauce reduce down. You'll know it's the right consistency when the bubbles that occur become bigger and look large and a little foamy.

3. Add the heavy cream and stir everything together, letting it come to a slow simmer. You can turn the heat back down at this point. After a couple of minutes, add the Parmesan cheese and stir well. Make sure it doesn't stick to the bottom of the skillet. Add the spinach and toss it with the sauce until the spinach wilts.

4. Once the spinach has wilted, put the chicken back in the sauce to warm it back up, then serve with the pasta and a giant piece of crusty bread.

Try the following variations:
  • sliced mushrooms
  • diced red, green, or yellow bell peppers
  • chopped asparagus
  • use freshly torn basil instead of spinach
  • lightly bread the chicken with Panko or Italian bread crumbs before cooking

OH!! And a tip for leftovers (hey, ANYTHING is possible): when you store them, mix the sauce right in with the pasta. Then, when you go to heat it up, add a little cream to revive the sauce. It's almost better the next day.


Wednesday, February 8, 2017

Simple Pasta Bake


1 16oz box medium shells pasta
1½lbs Italian sausage, cooked and crumbled
1 24oz jar Galassi Pasta Sauce with Mushrooms
1 8oz bag shredded mozzarella cheese

Boil noodles according to pkg and drain. While noodles are cooking, cook sausage and combine with pasta sauce, bringing to a low simmer. Combine with pasta and pour into a baking dish. Cover with mozzarella cheese and bake at 350° about 10 minutes or until cheese is melted. Serve with garlic bread and a salad for a well-rounded meal.

Wednesday, March 30, 2016

Stroganoff Meatballs


This is so easy, I feel guilty even posting it.

1 16oz bag frozen meatballs (not Italian style)
1 can low-sodium Cream of Mushroom soup
1 can Beefy Mushroom (Golden Mushroom could be used, too)
1 pkg onion soup mix
1 8oz carton sour cream
1 16oz bag egg noodles, cooked to package directions (al dente)

Thaw the meatballs (or don't).
Mix the soups & soup mix together in a large sauce pan.
Add the meatballs.
Simmer until the meatballs are warm.
Turn off the heat and add the sour cream.
Serve over egg noodles.

I mean seriously, folks...how easy is this?! Sure, you could complicate things up by making your own meatballs, adding mushrooms, creating a mushroomy soup conconction, blah blah blah....but this dinner literally took me 5 minutes.

Monday, March 14, 2016

Four Cheese - Macaroni and Cheese

I am a Kraft Dinner kind of girl. You give me that blue box and I'm a happy girl. Shameful, I know, but dammmmmn, it's so good! Because of that (and my usual distaste for cheese in general), I've never made homemade mac and cheese. Ever. My mom made it occasionally, but it was never my favorite. I couldn't even tell you how she made it, other than she baked it until it was dry. No bueno!

My brother, on the other hand, makes the best. Like...THE. BEST. I called him when I was standing in the grocery store to find out what he does. He obliged. (And thank God, he did...cuz WOOOOOO, Betty! This stuff turned out AHHHHHHHMAZING!)

This is in absolutely NO way healthy. Not even close. Don't gripe about calories, fat, carbs, or anything else because this recipe is fattening. I'm sure you can probably substitute for other ingredients, but let's be serious - if you're dieting, you probably shouldn't be looking up recipes for mac and cheese anyway, right? Obviously, this isn't something I make regularly (first time in almost 40 years of cooking, so....), so an occasional indulgence is probably not going to kill me.


I made a pot full of this, so gauge accordingly on portions. We had a LOT of it.

2 boxes pasta (shells are what I used)
6T butter
6T flour
24oz chicken stock
16oz heavy cream
16oz milk
2lb box Velveeta, cubed
4oz cream cheese, cubed
8oz cheddar cheese, shredded
8oz colby jack cheese, shredded

½ tsp seasoned salt
¼ tsp garlic powder
¼ tsp onion powder
1T Worcestershire sauce
2 tsp soy sauce
1 tsp mustard
2T sugar
salt
pepper
Optional: bread crumbs or French's fried onions (plain or white cheddar) mixed with butter to create a crunchy crust

  1. Cook the pasta according to pkg directions. Make sure to err on the side of al dente. Drain, but DO NOT RINSE!
  2. Make sure your chicken stock, cream and milk are open and ready to pour because this next part can get a little tedious and you can wreck a good roux pretty quickly.
  3. Make a roux by melting the butter in a large pan/pot over medium heat. Sprinkle flour in slowly and whisk until a paste forms. Let it bubble consistently until it starts to turn a little darker. Keep an eye on the heat. Too high, you'll burn. Too low, it won't cook or mix properly.
  4. Once the roux has browned a little, add the chicken stock, cream and milk right after one another, whisking the entire time. You may need to add more milk or stock to thin it, if it turns thick too quickly, so keep some ready. If you've done it right, it should have a gravy consistency. You're always better off being a little thinner than thicker here, because the cheese will thicken things up a LOT.
  5. Slowly add the cheeses, one type at a time, melting them slowly and stirring well. You may need to turn down the heat so you don't scorch it.
  6. When all the cheeses have melted, add milk or stock until it's the desired consistency.
  7. Add the spices and remaining sauces, tasting as you go. 
  8. Mix with the pasta and pour into a large casserole dish or large baking dish. 
  9. You can top with a bread crumb/butter mixture and bake in a 350° oven until the top is golden or serve as it is. We like it as it is.

You can also use any type of cheese: pepper jack, gouda, smoky cheddar, etc.
You can add to it, too: crumbled bacon, cubed ham, shredded chicken, hot sauce, buffalo sauce, 
salsa, even.


Tuesday, October 13, 2015

Mushroom ravioli and creamy caramelized onion sauce

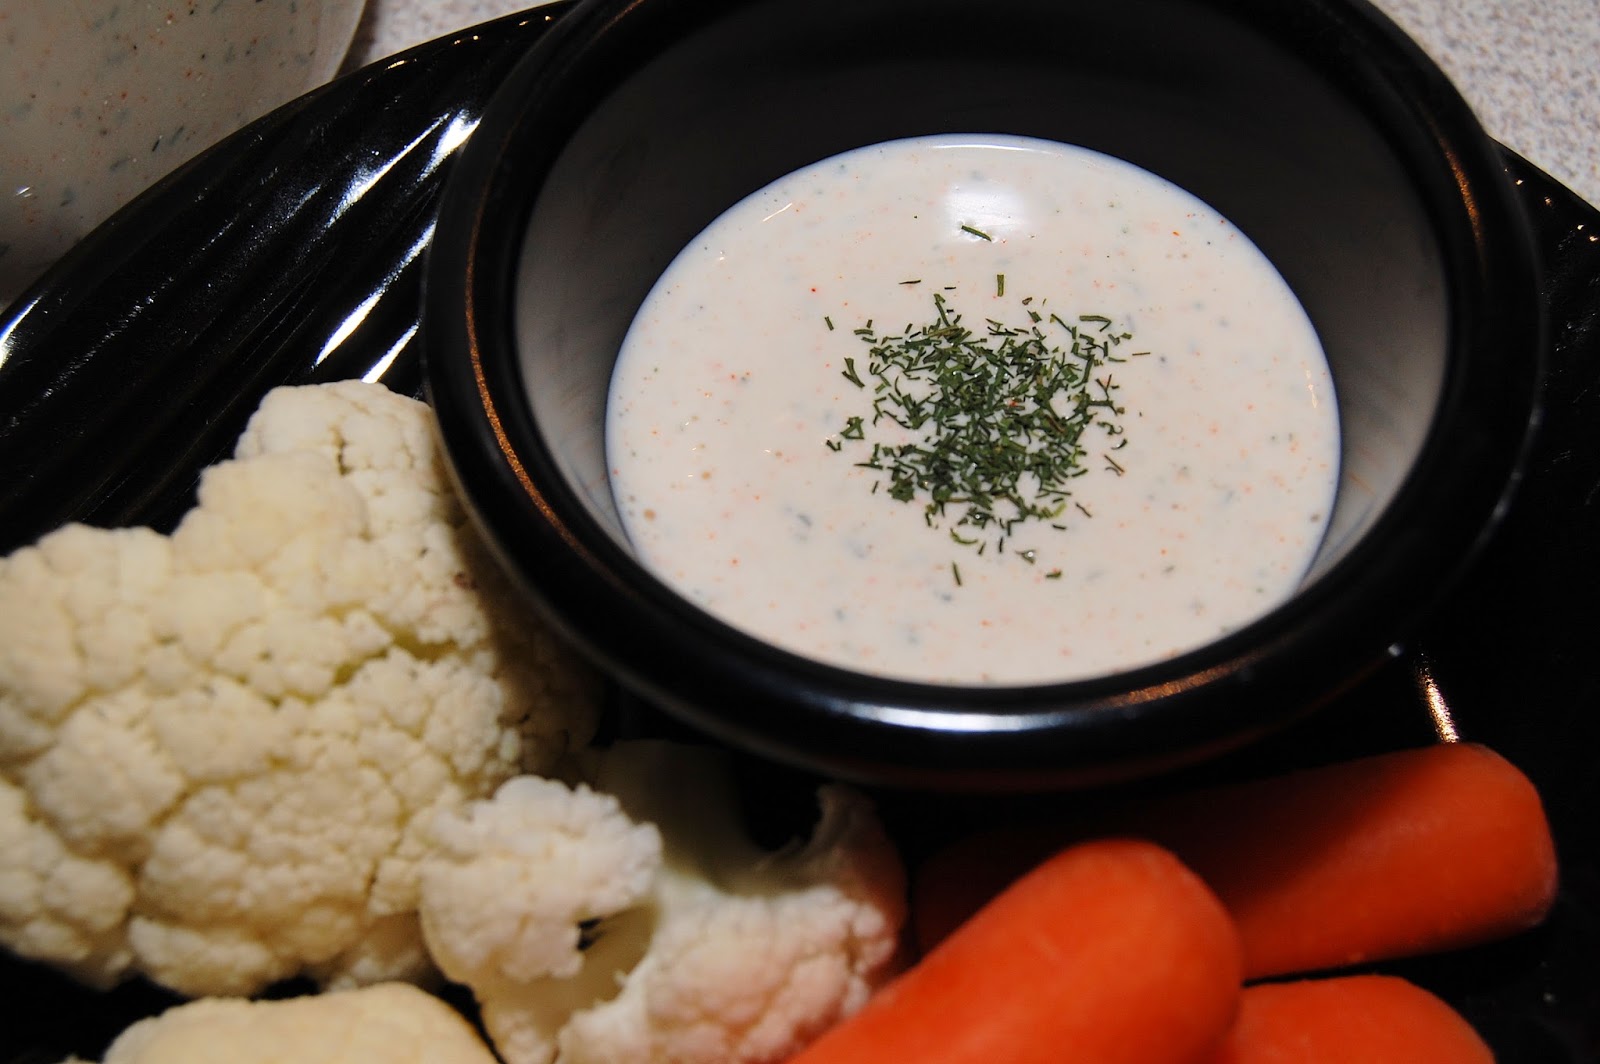
Okay, so the disclaimer to these ravioli - I am not a big mushroom person. Like, I'll eat them, but I don't crave them...they're not an ingredient I'll search out...I couldn't identify which kind is which. They're just filler to me. They're just meh.

When I was at the store today, I couldn't decide what I wanted for dinner. The kiddo suggested a steak. Uh, YES, please! So I picked up a pretty sirloin at the meat counter and then debated on what to put with it. Sure, I could go old school traditional and bake a potato, but how many times have I done this? Hordes. Again, meh. I figured I'd take a walk through the frozen food aisles to see if anything caught my eye. Yup! Mushroom ravioli. Yes, frozen. No, I don't care. And trust me, if you find a good brand, you won't care either. (I used Hy-Vee brand and they were fantastic. Likely, however, unless you live in Iowa or the neighboring areas, you won't find these. I've been told Bertolli are good, though.)

But what to put with it? I love tomato sauce (I mean, tomatoes? THOSE I crave.), but again, I've done it a thousand times. Maybe if I put some heavy cream with them, though. Oooh! That'd be good. So I grabbed a can of seasoned tomatoes, a pint of cream and some fresh garlic with the intention of coming up with something yummy.

As dinnertime got closer, though, the more I questioned my decision to do tomatoes. I totally don't do wine with cooking (uh...why cook with it when I can drink it? Helllooooo?!), so a white wine sauce was out. Onions appealed, though. And I had that cream. Maybe some sort of onion sauce? Suuuuure. Let's give it a shot. Worst case scenario, it sucks and I dump the tomatoes on it after all, right?

Confession time: I've never caramelized onions. (Okay, put back the pieces of your shattered lives and move on.) So I looked up a recipe. I can't and won't take credit for that. I will say that I followed their advice of sprinkling on a pinch of sugar later in cooking and a splash of balsamic vinegar. I also salted it twice to draw moisture out of the onions so the natural sugars in them would come with it. They turned out perfectly. I wish I'd taken pictures of them as they were cooking, but I usually don't bother with it if it's the first time I'm attempting a new recipe because it distracts me from doing it right. Boy, do I wish I would have, though because they were PERFECT! Beautiful brown color, ideal translucence, incredible flavor!

Sorry, I'm getting carried away.

I boiled the ravioli as the package directed (3 mins in salted water) and made the cream sauce. Now, I will tell you, the onions take forever. FOR. EV. ER. Make sure you set aside about 45 mins for the onions to cook before you start the pasta.  But that's okay - it's foreplay. Sweet baby Jesus, is it foreplay. The last part of the sauce only takes a couple minutes, so you can make it while the ravioli is cooking.

This sauce and these ravioli are the most decadent, delicious thing I've ever cooked. EVER!

Pretty sure, Bella Swan would cry over these things. Edward's all "Money, sex, money, sex...cat." And Bella's like, "Dude, stop talking. These ravioli are orgasmic." 

I mean, just LOOK AT THEM!


Okay, enough talk. Go make them!

1 pkg frozen ravioli (I used mushroom, but cheese would be good, too!)
2 onions, sliced
2-3 T olive oil
2 T butter (or margarine)
1 T minced garlic
1 tsp salt
1 pinch sugar (optional)
1 T balsamic vinegar (optional)
1 pint heavy cream
1 dash ground sage
1 dash ground nutmeg
2 tsp flour (or corn starch)

Use the recipe link to caramelize the onions. I added the garlic, nutmeg and sage about halfway through the process just to give it some extra flavor. The sugar, I added about 40 mins into it. The balsamic vinegar was added shortly thereafter. I did add a small amount of water toward the end, too, just to keep the onions from getting crispy.

When the onions are done (about 45-60 mins later), sprinkle the flour over the top and stir it well. This will help the sauce thicken a little. You don't have to add it, but I was worried the sauce would be too thin if I didn't. Slowly, add the heavy cream, stirring gently so you don't tear the onions.

Bring to a simmer while you drain the ravioli and serve it up. Pour over a couple spoonfuls of sauce and enjoy.

* I do not take any responsibility for the moaning that will ensue while consuming this dish. You're responsible for your own soundproofing if you have thin walls in your house.

Oh! I forgot to tell you, the steak was only meh compared to the ravioli. I threw some sauce on it, too, but even so, it just sat there like an ugly stepsister to the Cinderella that are these ravioli. Poor thing.


Tuesday, August 25, 2015

What is all that crap and why do I need it?


My son just signed the lease on his very first apartment. As we all were at that point in our lives, he's trying to figure out what he needs to furnish his home. He was on top of buying a new bed and finding a second-hand couch (didn't we all have that?). But what about the things you don't think of? Sure, you'll pick up a box of Band-Aids when you need them. And light bulbs get bought on a whim, too when you realize you are sitting in the dark once the sun goes down. Toilet paper is a no-brainer, but sometimes you forget the plunger until that first 1am call to the super to come snake an overflowed toilet, right?

What about the kitchen? Well, for most bachelors my son's age, as long as there's room in the fridge for the pizza box and carry-out containers, life's good, right?

As a mom, I absolutely cannot let a kitchen go unfurnished. As you see above, I have mechanisms and tools for almost every occasion. I remember when my kids were little and they'd help me in the kitchen, they'd ask, "What does this do, Mom?" and "Why can't I use this?" and "Why do we have three _______?" Yes, I have a lot of kitchen utensils, but with very little exception, I am unwilling to part with any of it.

Take that rusty slotted spoon in the center with the beige-colored handle, for instance. I stole that from my brother's house when I moved out for the first time. Why? Well, because I needed one and I was broke as hell. That spoon? Not going anywhere. It's perfect for skimming the fat off of broths and digging French fries out of the deep fryer. The blue slotted spoon next to it? That's the serving spoon for veggies like corn and peas. The tan colored spoon facing the other way with the similar shape? That's excellent for gravy. Also, it's super great for making Rice-a-Roni. Of course, we've got three ladles because...well, we're a soup family and there's almost always one dirty all the time. Then you've got the potato masher, the can opener, tongs (which are in the dishwasher and not seen here), ice cream scoop, pizza cutter and numerous other tools I use from time to time.

But does a "new kitchen" like my son's really need all that crap? No. Not really. If I had to make a list of kitchen "essentials" though, it would look something like this:

  1. a wire whisk - scrambled eggs, mixing sauces and salad dressings, making gravy without lumps, and getting all the sticky bits off the bottom of a pan when you're making a killer sauce
  2. 2 spatulas - one metal for cooking on cast iron or metal pans, one plastic covered one for Teflon skillets and coated baking pans so you don't scratch them up
  3. a ladle - at least one, but probably two if you cook as much soup as I do
  4. slotted spoon - great for scooping out food from a soupy sauce or gravy, or taking fried things out of the oil
  5. serving spoon - great for getting the soupy sauce and gravy to pour over the top of your food
  6. wooden spoons - absolutely the most important tool in my kitchen for mixing. SO versatile!
  7. pizza cutter - obviously, for cutting pizza, but also great for minimizing hassle when cutting dough for noodles or cutting up waffles and pancakes for the kids
  8. ice cream scoop - unless you're like me and just eat it right out of the carton with a spoon
  9. rubber scraper - I can drink ranch dressing with a straw, so when I make up a batch, I want to make sure EVERY drop of it gets to where it needs to be. This is perfect for that. Also helpful when making cake or cookie batter so you get all the dry ingredients mixed into the wet ingredients
  10. can opener - not everything has that little pull-back tab system. And please trust me when I tell you there is not an electric can opener on this planet that will work every time without dropping a can all over the place or slopping the liquid from inside all over you, the counter and the floor. Don't waste your money. Just get a crank handle one. No need to go expensive. Just make sure it's a heavy duty one. (Nothing I've found works as well as that red-handled thing you see in the drawer. Just a heads up.) When it gets dirty, take a toothbrush and some dish soap to clean off the blades and gears and you'll be fine.
Those are the basics for what you need in the utensils drawer. Obviously, peruse the kitchen aisles or a Bed, Bath and Beyond for all the fancier gears like lemon zesters, cheese graters, garlic presses, and apple corers if you want them, but for general, everyday use, the 10 things listed above should get you through an average meal.

As for other tools and supplies?

  1. Beverage pitcher - 2qt is best and will fit in most fridges easily. Not gonna lie - Tupperware is your best bet on this. They last for decades. The other ones tend to peel, get sticky or gross after a while. I have the same 2qt pitcher I got for my wedding shower 21 years ago and it still looks brand new. If you ever think you'll make Kool-Aid or iced tea, don't go cheap on this.
  2. Strainer - Again, Tupperware is the best option. The ones I've found lately in stores have holes that are too big and stuff gets through them. I do have a metal strainer that came with a set of cookware I bought about 20 years ago and it's been perfect, but my back-up strainer is a Tupperware one. It's sturdy, stuff doesn't get through, it can go through the dishwasher and it won't rust, get sticky, greasy or gross.
  3. Measuring cups & spoons - I hate sounding like a Tupperware commercial but that's what I've used for years. I have a Pyrex measuring pitcher which I use pretty often, but anything else that has been plastic just falls apart. It's not worth it if I'm replacing them every couple of years. The only trouble I had with Tupperware was the label wearing off. If they've changed the style to where the measurement amount is imbedded in the plastic like it was in the 70s and 80's? Great. Otherwise, memorize which spoon is which.
  4. Cutting board - So many options out there to choose from. Personally, I like a wooden slab. Others like the plastic ones. Some people use the ones that roll up so you can scoop your stuff into the pan. It's a personal preference thing, but my suggestion is to have two - one for meats and one for veggies. No cross-contamination that way.
  5. Cutlery - speaking of cutting boards. Chopping knife, bread knife, paring knife and steak knives are your basic needs here. You can do just about anything with those. In fact, the best paring knives I've found are the little ones with the plastic handles that they sell at the check-out at kitchen stores. They usually run about a buck a piece and they last FOREVER! Make sure you get a good sharpening stone, though, if you invest in a good set of knives. And DO NOT put them in the dishwasher. Always wash your knives by hand or you run the risk of the harsh cleaners dulling the blades.
  6. Skillets - Cast iron is my personal preference here. They can be pricey, but they will last a lifetime, maybe two or three. Literally. My brother cooks with the same cast iron skillets that my mother owned. It's possible they even belonged to my grandmother. Learn how to care for them, season them, clean them and store them, though. If you don't want to go with cast iron, check reviews. Every cook has their preference. I hate Teflon b/c it flakes off, but I also hate stainless steel because everything sticks to it and I spend an hour trying to clean it off.
  7. Sauce pans, soup pans, and stock pots - Do not skimp and buy crappy cookware. You don't have to spend a paycheck on a set, but don't just get whatever is cheapest at the department store either. Your food will pay the price. I have two sets of pots and pans and use them both equally - one was a set of copper-bottom Revereware I got as a wedding gift in 1994. The second set I got about 4 years later. It has a "non-stick" coating that has flaked off a lot over the years, but they're heavy, sturdy, solid pots so I still use them. I've used enamel ware and hated how everything sticks to it. I'm sure there are more expensive brands that don't do that, but my luck with it hasn't been good.
  8. Cookie sheets/baking pans - Again, the cheaper you are, the worse luck you'll have. I've bought cheap, thin metal pans at the dollar store b/c I didn't feel like going into town, but they're only lasting me about six months before they're bent, burnt or flimsy. If I've cooked anything with tomato sauce in it? Forget it. The acid eats through the pan and I have to throw them away. You don't have to spend a fortune on them, but get at least one good cookie sheet and at least a 9x13 baking dish (great for roasting chicken or baking a cake or a pan of lasagna). Glass is better when it comes to baking dishes, but stick with Pyrex brand dishes. They last forever and clean up pretty easily.
  9. Pot holders - This is an easy one to overlook, but unless you have superhuman abilities, that pizza is going to stay in the oven until it's cold. I own plain pot holders, oven mitts, wrap-around ones...the ones that are used the most are the plain old square ones. The bigger the square, the better. The mitts, I've found are a bit cumbersome as are those silicone fingertip mits. 
  10. Dish towels - Even if you have a dishwasher and rolls of paper towels, you will - at some point - need dish towels. Mine is usually hanging on the fridge handle or flung over my shoulder. 
Yes, this probably seems like a lot of "must-haves" for a new kitchen, but some people never learned how to stock a kitchen. Many people in my generation weren't taught how to cook; take-out and drive-throughs were too available to us in the 80's and 90's. And since we didn't learn to cook, neither did/will our kids. I'm thankful I know how and that my kids have wanted to learn.

If I missed anything that seems obvious to you, mention it in the comments!

Wednesday, July 1, 2015

Food Processor Egg Noodles


2 c flour
2 whole eggs
½ tsp salt
1 T oil (vegetable, olive, etc.)
4-6 T water (depending on humidity in your house)

In a food processor with the dough attachment blade, add the flour, eggs, salt, oil and 4 T of water. Turn on and let it mix until it forms a ball. Add water one tablespoon at a time if it doesn't seem to pull together. Immediately wrap in plastic wrap and let set for an hour.

Cut dough in half, then sprinkle flour on a counter or table and roll out into a sheet the thickness you desire and cut into noodles or shapes. (A pizza cutter makes it super quick!) Immediately cook the pasta in salted boiling water, for up to 5 mins, but keep an eye on it. When it floats, it's ready to drain and serve. Depending on the thickness of the noodle, they could take 2 mins to cook or a full 5.

If you're not ready to cook them right away, you can flour them well, let them dry for about an hour, then form the noodles into a nest shape. Let them dry completely, transfer them to airtight storage, and store them up to 4-6 weeks in a dark, dry place (such as a pantry). You can also freeze them.

Serve with butter or the sauce of your choice, or mix with beef or chicken pieces and gravy for a complete meal.

If you have a pasta machine, this makes the process SO much easier. Whip it through the machine once to flatten to the thickness of your choosing, then send it through the cutting blade. Perfect pasta EVERY time.

Friday, May 29, 2015

Cream Cheese Shower Mints


1 8oz pkg cream cheese (in a block, not the whipped kind)
1 32oz pkg powdered sugar
½ tsp mint flavoring (mint, peppermint, spearmint or whatever flavor you prefer)
food coloring of your choice (gel works best)
granulated sugar (½ cup or so)
Candy mold (optional - hard plastic or silicone both work fine)

Beat cream cheese in a mixer or food processor until smooth. Add powdered sugar (cover mixer with towel so it doesn't blow all over) and mint flavoring, and mix together until it forms a doughy consistency. Remove from food processor or mixer and turn onto counter (you can line with wax paper first if you'd like). Add drops of food coloring and knead with your hands (you might want to use rubber gloves for this, the coloring will stain your hands) until it's well-mixed. Measure out

Measure out about ½ tsp of mint mixture and roll in the palm of your hand, then toss into sugar until coated. Press into candy mold and flip onto waxed paper. If you choose not to use a candy mold, you can form them into little balls and then flatten with the back of a fork dipped in sugar. Let dry in the fridge for four hours on one side, flip and let dry for another 4 hours.

They can be frozen ahead of time, but freeze them flat before putting into a zipper freezer bag, otherwise they'll stick together. When thawing them out, make sure to remove them from a bag and put them on paper towels on a flat surface in the fridge.


Wednesday, March 4, 2015

Ranch Dressing


Want ranch dressing without all the preservatives that come in the mix packets or pre-processed containers? It's really not that tough and homemade tastes SO much better than the prepackaged mixes.

2 c mayonnaise (you can make your own homemade mayo or organic, if you prefer. I used Kraft.)
2 c buttermilk (again, organic is best, but not necessary)
2 tsp garlic powder (NOT garlic salt)
2 tsp onion powder
¼ tsp celery salt
¼ tsp paprika
¼ tsp salt (sea salt is best, regular salt is fine, though)
¼ tsp white or black ground pepper
½ tsp dried oregano
1 tsp dill weed
2 tsp dried parsley

Put the mayonnaise in a bowl and gradually add buttermilk, blending with a wire whisk. Stir slowly so you don't get chunks of mayonnaise. Once the mayo and milk has been mixed, add the spices, stirring well until everything has been combined. Chill for at least 30 minutes before serving. Perfect with salads or as a dipping sauce for chicken or appetizers.

If you would rather have ranch dip for vegetables, crackers, chips, or a baked potato topping, use sour cream instead of buttermilk, combining with the mayonnaise for a thicker consistency.

Optional additions, depending on your tastes:
  • ½ c crumbled bleu cheese
  • ½ c beer (reduce buttermilk to 1½ c)
  • ¼ tsp cayenne pepper
  • 2 tsp Frank's hot sauce
  • ½ tsp chili powder

Sunday, February 8, 2015

Swedish-ish meatballs


I say "Swedish-ish" meatballs because I don't know how truly Swedish they are. I just know they taste good and beat the shit out of anything you find at Ikea.

One thing you have to be careful about using this recipe is the sodium content. I strongly recommend you do NOT add salt to this recipe. I also suggest not skimping on the brand of soups you buy - again, it's a sodium issue. Buy the cheap stuff and you won't be able to control the salt content and it will be way too bitter to eat. This is a Crockpot recipe, but you can also bake them in a deep baking dish at a low heat until everything is hot.

2 bags frozen original style meatballs (as opposed to "Italian-style")
2 cans LOW SODIUM - Cream of Mushroom soup
1 envelope Beefy Mushroom (or Onion) soup mix
2 cups milk
1 cup LOW SODIUM beef broth
½ tsp ground allspice
¼ tsp ground nutmeg
1- 24oz pkg wide egg noodles, cooked per pkg directions

When I made these, I decided since I was putting them in the crockpot that I would fry them in oil first. I could have pan fried them or baked them, too. I just chose the deep fry option to get a good crusty shell on the meatball so they wouldn't fall apart in the slow cooker. It's like getting a sear on a steak or roast to keep the flavor in and keep it from falling apart during the cooking process.

While the meatballs cooked in the skillet, I mixed together all the liquid ingredients along with the spices in the crock. When the meatballs were done, I added them and set it to low (10 hours). You may need to add milk later on as it concentrates to thin out the gravy.

Serve over cooked egg noodles (rice works, too).

Tuesday, January 27, 2015

Hot Wing Aioli


3/4 c mayonnaise
2 crushed garlic cloves
3 T buffalo wing sauce (Frank's, Hooter's, Cookie's...whichever brand you prefer)
¼ tsp Cayenne pepper (more or less, to taste)
¼ tsp onion powder (optional)
¼ c Bleu cheese crumbles (optional)

Mix together and serve with pretzels, crackers or combine with shredded chicken for a spicy chicken salad.

Or lick it off your fingers. You know, like I do. YUM!

Thursday, December 18, 2014

Better than Sex Paleo Honey Mustard Chicken


No seriously...this chicken really is better than sex. It's so good you'll slap your granny.

And it's paleo. Yep! Totally freakin' paleo.

2lbs boneless skinless chicken breasts
½ c olive oil
2T lemon juice
1T garlic powder
½T ground mustard

Mix together the last four ingredients to create a marinade for the chicken breasts. I poured it over the chicken and let it set for about 3 hrs. I also used a fork to stab the chicken a little to help tenderize/flavor the chicken. When ready to bake, preheat oven to 400°

Sauce:
½ c raw organic honey
½ c Dijon mustard
1T minced garlic
½ tsp ground mustard
½ tsp onion powder
1 tsp lemon juice
1 tsp basil leaves
1 tsp dried thyme

Mix the ground mustard, onion powder and lemon juice together so it doesn't clump up when mixed with the rest of the ingredients. Combine all ingredients. Set aside.

Line a rimmed cookie sheet with aluminum foil and place a cooking rack over that. Spray with olive oil cooking spray and place the chicken on the rack.  Bake at 400° on one side for 10 mins. Turn chicken with tongs. Bake another 15 mins. Chicken drippings will fall to the foil. Leave them there. When the timer goes off, pull them out and generously coat chicken pieces with honey mustard mixture. Bake for 10 mins. Flip, coat opposite side and bake another 10 mins.

When done, place in a shallow baking dish and carefully take the cooking rack out of the pan and using a whisk, mix together the chicken juices and the honey mustard sauce that dripped off the chicken. Pour over the chicken in the serving dish and serve with steam vegetables or rice.

I am VERY picky with what I eat on this paleo diet, but this is something I could eat every day if I could. My family is not Paleo and they all ate two helpings. You may want to double the recipe, if you want leftovers because it will go fast!